The DataStax ODBC driver with CQL connector for Apache Cassandra and DataStax Enterprise Available Now

Alex Popsecu

Today DataStax is delighted to announce the general availability of a new ODBC driver built on top of the Cassandra native protocol (CQL) that can be used free of charge with both open source Cassandra and DataStax Enterprise. The DataStax ODBC driver for Apache Cassandra, developed by ODBC software leader Simba Corporation, is compliant with the latest ODBC 3.52 specification, runs on both 32 and 64-bit versions of Windows and Linux, and can be downloaded from here
The DataStax ODBC Driver for Apache Cassandra enables the integration with a broad array of tools for data processing, migration, analysis and visualization by leveraging the power of both CQL and SQL. It stands as a simple integration point to tap into the online data stored in Apache Cassandra, the massive, scale-out, always-on, distributed database that was built for the cloud, mobile, and internet-of-things.
Let’s take a look at how to get started with the DataStax ODBC Driver for Apache Cassandra. We will walk through using the 64-bit driver on Microsoft Windows, but the process is very similar for the 32-bit driver, and for Linux. In the end we will show how to connect from Tableau to explore a simple data set in Apache Cassandra.
First, ensure that you have a running Apache Cassandra cluster, and note the IP address of one of the nodes, as well as the native protocol port for that node.
Next, let’s install the driver. Download and run the DataStaxCassandraODBC64.msi:
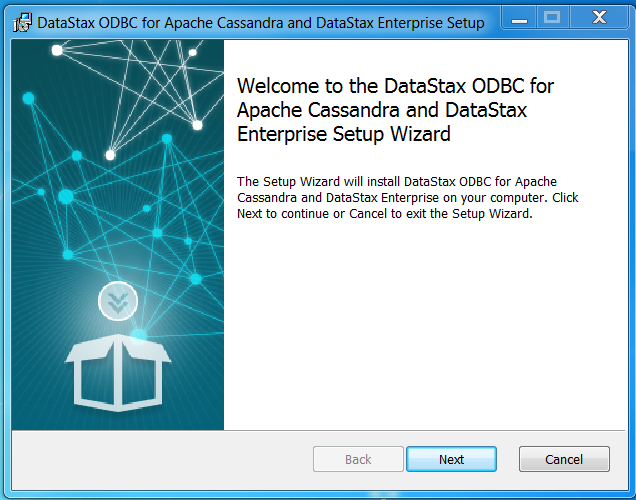
Click “Next”. Now, accept the license terms:
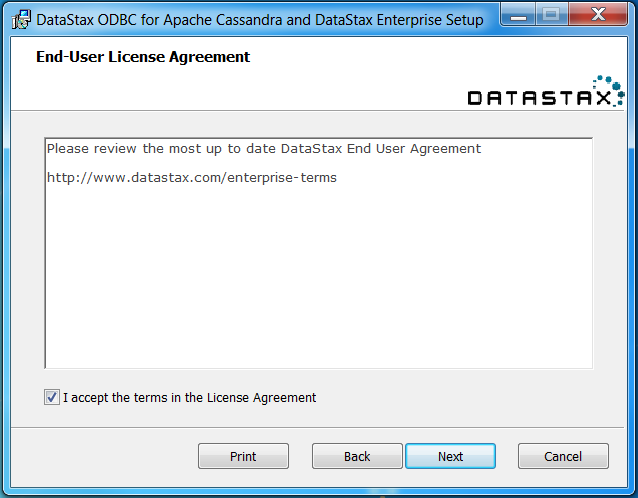
Click “I accept the terms in the License Agreement” and then click “Next”. Now, choose a Destination Folder:
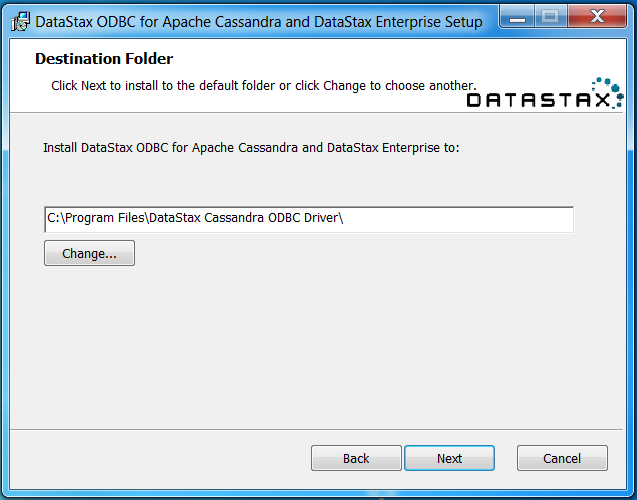
Click “Next”.
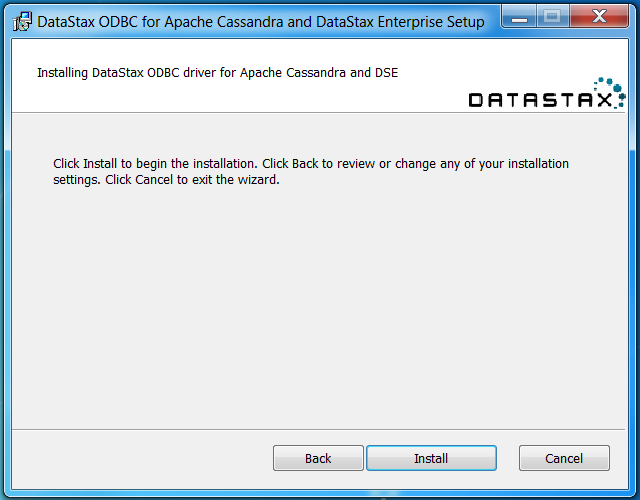
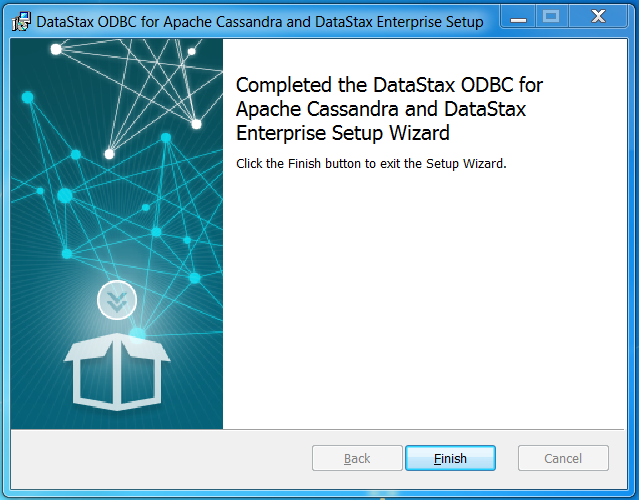
Click “Install” to complete the installation. Once it is completed, you will see a success screen:
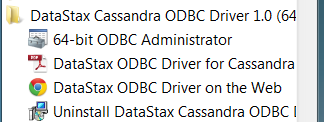
Now to set up a Data Source Name (DSN) for use in the ODBC tools. Start by opening the ODBC Administrator. You can find it under the Start menu, under the DataStax ODBC Driver for Apache Cassandra folder:
When it opens, click on the System DSN tab:
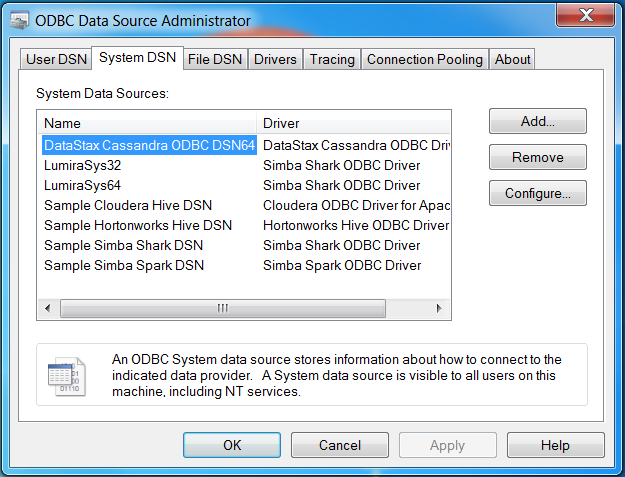
You will see the DataStax Cassandra ODBC DSN64 DSN. Select that and click “Configure…”:
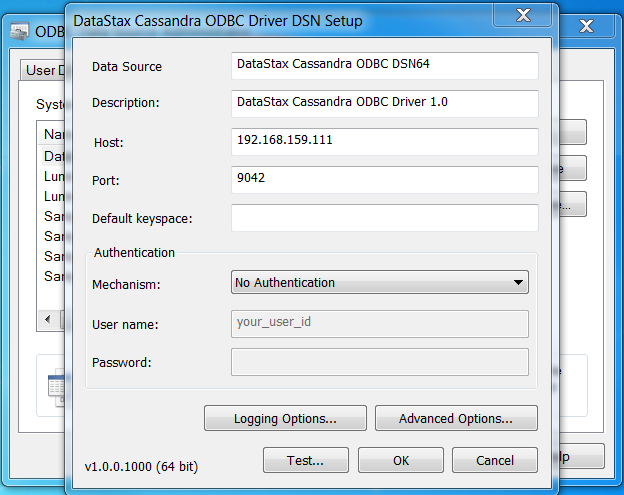
Here you will enter the host and port for your cluster. You can also optionally change the name of the DSN and the description, as well. Click “Test…”:
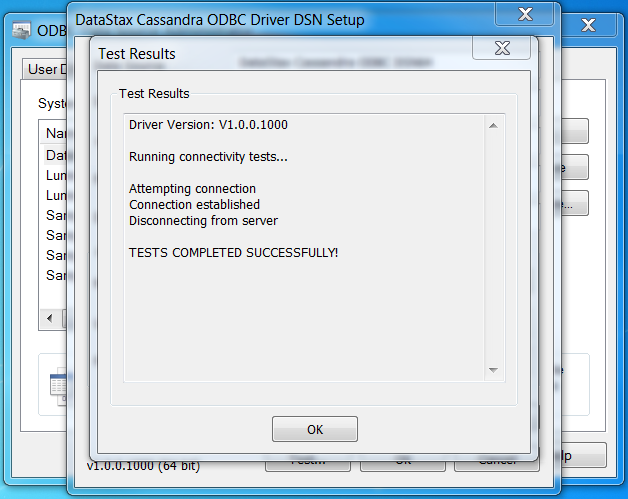
Click “OK”, then click “OK”, and finally click “OK” a third time. Now you have configured a DSN, and you can use this DSN in your ODBC-based tools.
As an example, let’s use Tableau and connect to a simple data set in Apache Cassandra to explore. First, make sure you have downloaded and installed Tableau version 8.3, and go ahead and start it:
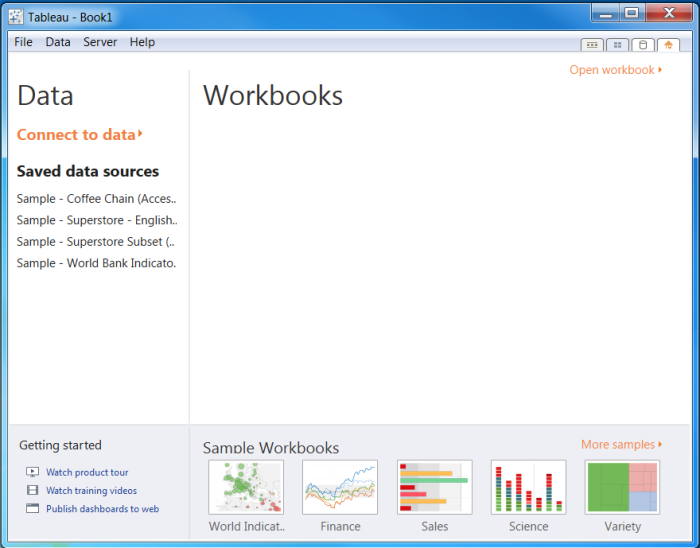
From here, click “Connect to data”:
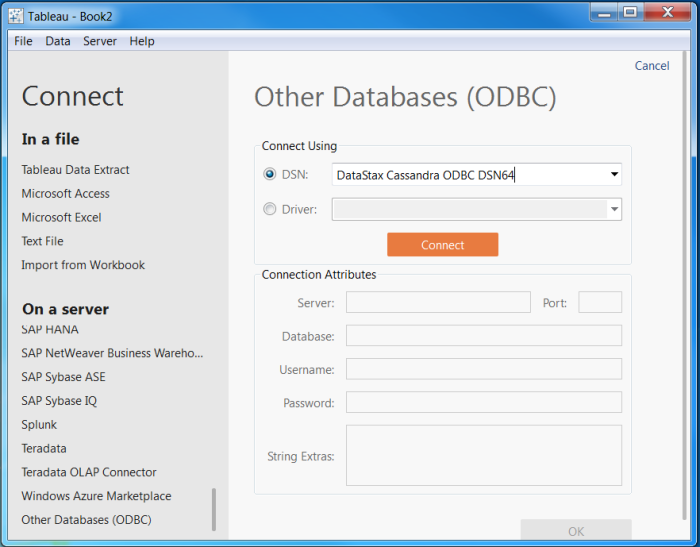
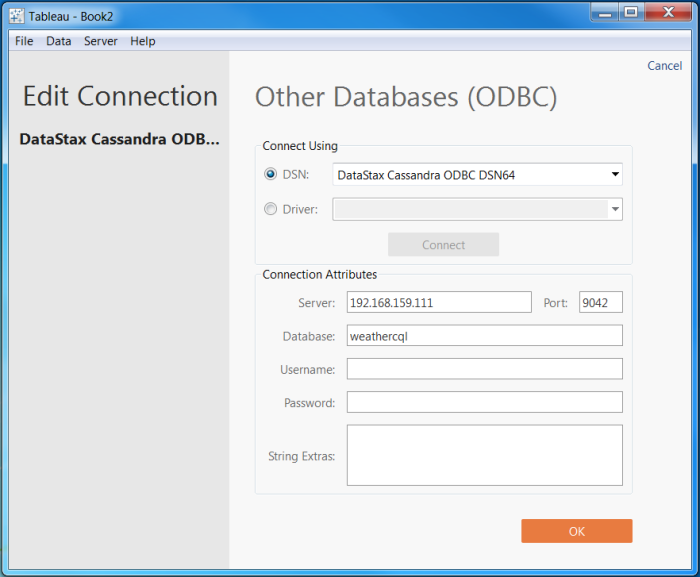
Select “Other Databases (ODBC)” and choose the DSN we created above. Here, we used the default name “DataStax Cassandra ODBC DSN64”. Next, click “Connect”, and fill out the Server, Port, and Database fields. For this example, we will use the WEATHERCQL keyspace and the DAILY table therein, which is included as a demo in DataStax Enterprise 4.6:
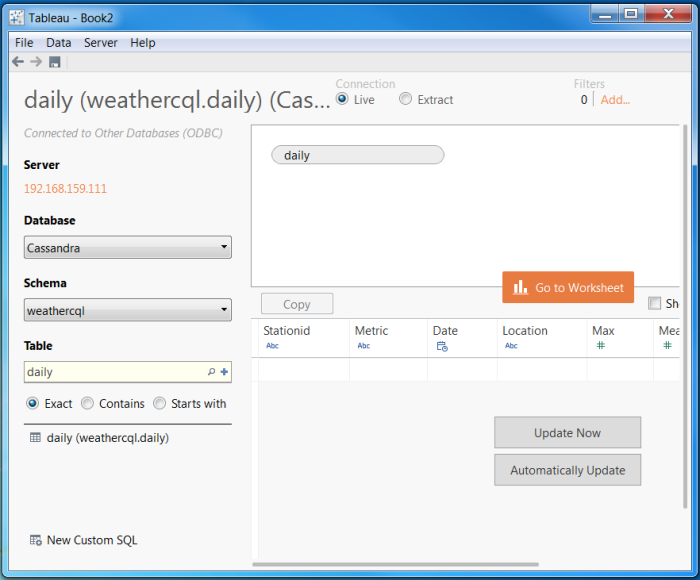
Choose the “Cassandra” Database, and search for - and select - the weathercql Schema. Lastly, search for the daily table. Drag the “daily (weathercql.daily)” table to the “Drag tables here” box in the upper right:
Click “Go to Worksheet”. You may get this popup warning, but you can click “OK”. There are some limitations in the driver, but Tableau will be able to compensate for them. If you are interested, you can click “Show Details” for more information.
We can now create a simple Worksheet:
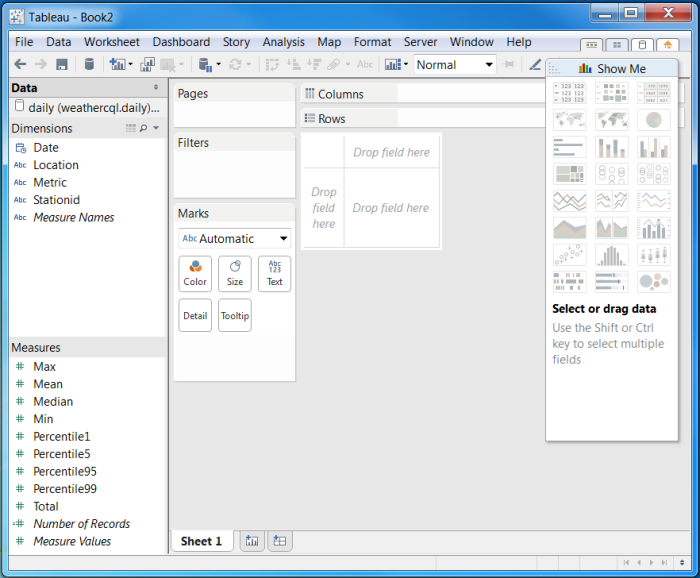
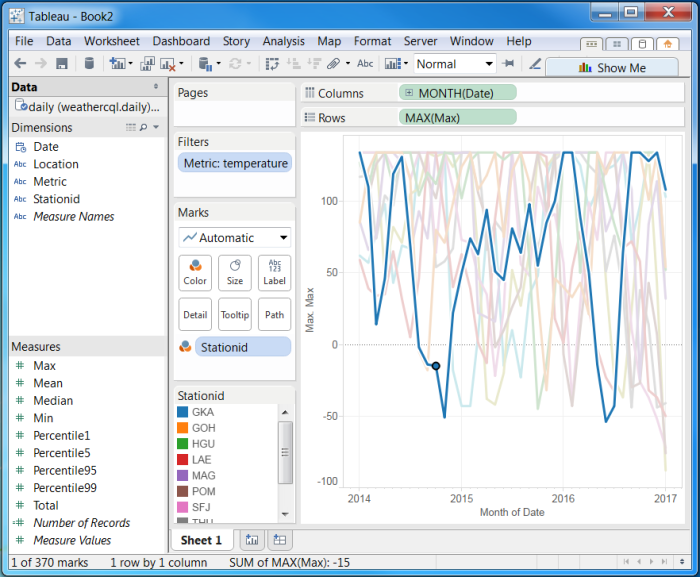
This Worksheet is a “Live” Worksheet, meaning that Tableau will make live queries to the data in Cassandra as the operations happen. You may see status popups indicating that it has issued a query. Let’s look at the maximum temperature for each month in the data for each of the station locations. First, create a filter on the Metric Dimension by dragging the Metric Dimension into the Filters box. This will bring up a popup box to choose temperature:
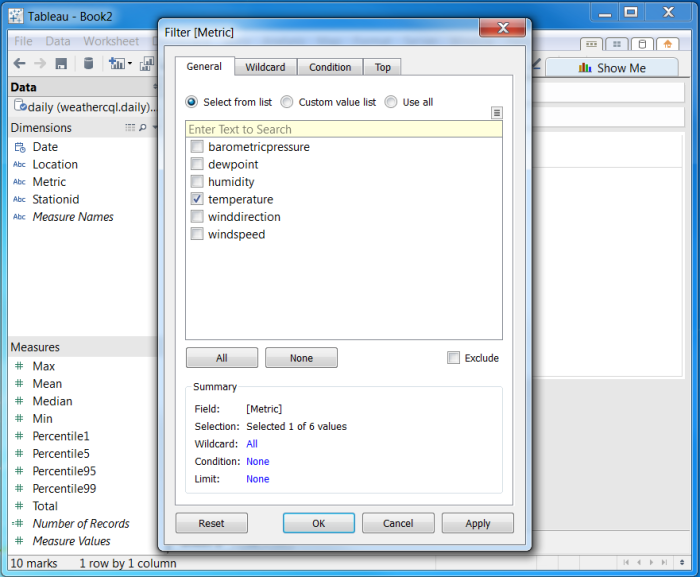
Click “OK”. Now, drag the Date Dimension to the Columns box. We want to change the function on the Date value to Month and Year, but it defaults to just Year. If you hover over the blue bubble for YEAR(Date), there is a down arrow you can use to bring up another menu. When you do this, choose the second Month option, the one that has “May 2011” (or something similar) next to it. Next, drag the Max Measure to the Rows box. We want the maximum of the maximums, so hover over the SUM(Max) bubble to find the down arrow that will allow you to choose the Measure submenu, where you can choose Maximum. Then, drag the Stationid Dimension to the Marks box, specifically on the Color box:

The finished chart should look like this:

We can click on one of the lines to see just that line time series:
You can continue refining this Worksheet and then save it (by clicking File->Save).
This completes our short guide. The online documentation for the driver is available here and a manual, in PDF format, is included with the installers. Now you can download the Download DataStax ODBC driver for Apache Cassandra and DataStax Enterprise with CQL connector and put it to real work!
More Technology
View All
How to Build a Crystal Image Search App with Vector Search
Knowledge Graphs for RAG without a GraphDB